How to Make A Christmas Angel Ornament out of Wired Ribbon (A Kid’s Craft)
What’s your favourite craft to do with your Littles at Christmas time? Last year, we stumbled upon this really easy ribbon angel ornament craft, and I thought I’d share it with you all today. It’s so easy, and my girls loved it. Make sure to scroll to the bottom of this post to see 12 days of Christmas craft inspiration from December 1st through 12th from my blogging friends!

To make these ribbon Christmas angel ornaments, you’ll need:
- a roll of wired ribbon (I used 2″ wide ribbon)
- a stapler
- beads or gems for embellishment
- twine or string
- bells
- hot glue gun
Directions:
I first found this idea here on YouTube. Check out her video if you want to see a great video tutorial on how to make these.

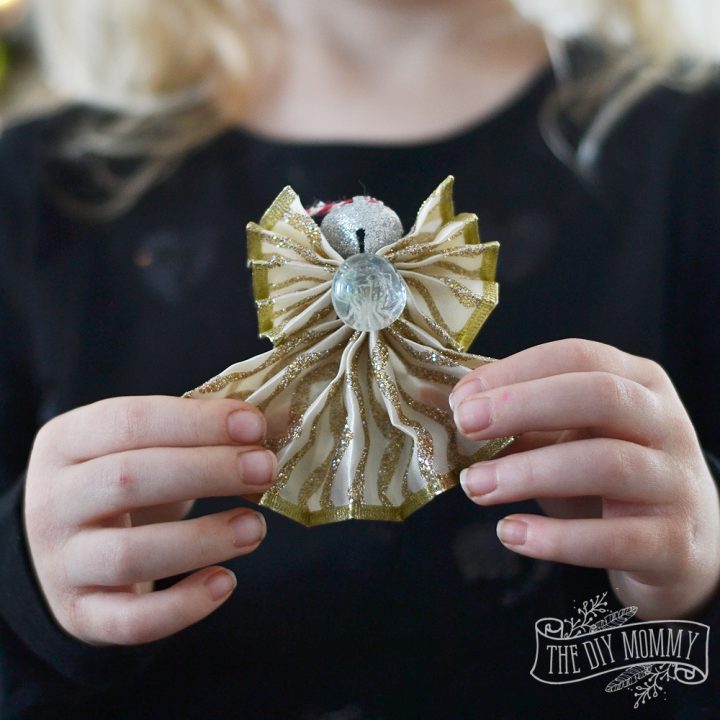
First, cut your wired ribbon into a 14″ piece and a 10″ piece for each angel ornament.

Next, fold each piece accordion style (I folded in approximately 1″ increments). Staple the shorter pieces in the middle and fluff out each side to make wings. Staple the longer pieces at the top and fluff them out to make a skirt.

Glue the wings to the skirt as shown with a glue gun.

Finally, embellish your angel ornaments by gluing a bell on top of their wings with a glue gun, threading some string through it for hanging, and gluing a gem or bead at the center of the wings.

Ta-da! Your angel ornaments or finished and ready to hang on the tree or give to grandma and grandpa as a gift. These would also make pretty gift toppers, too!
How to Make A Christmas Angel Ornament out of Wired Ribbon
A simple Christmas Angel Ornament using wired ribbon
Materials
- Roll of wired ribbon (I used 2″ wide ribbon)
- Beads or gems for embellishment
- Twine or string
- Bells
Tools
- Hot glue gun
- Stapler
Instructions
- Cut your wired ribbon into a 14″ piece and a 10″ piece for each angel ornament
- Fold each piece accordion style (I folded in approximately 1″ increments)
- Staple the shorter pieces in the middle and fluff out each side to make wings
- Staple the longer pieces at the top and fluff them out to make a skirt
- Glue the wings to the skirt with a glue gun.
- Finally, embellish your angel ornaments by gluing a bell on top of their wings with a glue gun, threading some string through it for hanging, and gluing a gem or bead at the center of the wings.
Pin Me:


Welcome to the 12 Days of Christmas Blog Hop! From December 1st to December 12th, Danielle from Creatively Homespun will be hosting 15 AMAZING bloggers that are all showing off some of their favorite Christmas creations. Get prepared to be awestruck with some incredible recipes, DIY projects, and gift ideas!

Each day at least one blogger will be sharing a project of their choice. We can say with full confidence that you are sure to find something to inspire you for this joyful holiday season.
I hope you’re feeling the holiday spirit just as much as we are! Be sure to keep popping by the other bloggers throughout the 12 days!
On the 1st day of Christmas: Creatively Homespun
On the 2nd day of Christmas: Pocketful of posies
On the 3rd day of Christmas: CREATIVELY HOMESPUN
On the 4th day of Christmas: THE DIY MOMMY
On the 5th day of Christmas: REFRESH LIVING
On the 6th day of Christmas: SMART GIRLS DIY
On the 7th day of Christmas: MY LIFE FROM HOME & OUR CRAFTY MOM
On the 8th day of Christmas: OLD HOUSE TO NEW HOME
On the 9th day of Christmas: THE DEANS LIST & GREEN WITH DECOR
On the 10th day of Christmas: OUR HOUSE NOW A HOME & LEHMAN LANE
On the 11th day of Christmas: TASTEFULLY FRUGAL
On the 12th day of Christmas: FARMHOUSE 40
Disclaimer: This post contains affiliate links. Thanks for supporting The DIY Mommy!


These angels are so adorable! I love that a kid could do most of the steps and give them as a gift. Great idea!
Oh my gosh these are so cute! My boys would love making these AND I have everything we need to make them here…even better! Thanks so much for sharing this great idea!!
I just love this!! Thank you so much for being a part of the hop and creating such a beautiful post! Pinned!!